


Carbon fiber damage on vehicles requires specialized repairs due to intricate structural bonding. The process begins with careful inspection, preparation (cleaning, removing loose fibers), and using tools like precision knives, sandpaper, adhesives, and resins. For small damages, autoclave-cured carbon fiber prepregs restore areas precisely. Severe cases may need frame straightening and reinforcement by advanced body shop services, following automotive collision repair best practices for safety and structural integrity. Effective carbon fiber repair methods maintain both aesthetics and structural integrity.
“Uncover the art of carbon fiber repair with our comprehensive guide, designed to transform your car’s damaged parts into a masterpiece. Carbon fiber, known for its strength and style, requires meticulous care during repairs. This article delves into understanding carbon fiber damage, outlining the necessary tools and materials, and providing a step-by-step process for successful restoration. Discover how to apply these advanced repair methods, ensuring your car retains its sleek, high-performance appeal.”
- Understanding Carbon Fiber Damage and Repair Process
- Tools and Materials Required for Carbon Fiber Repairs
- Step-by-Step Guide to Effectively Repairing Carbon Fiber Car Parts
Understanding Carbon Fiber Damage and Repair Process

Carbon fiber damage on a car can range from small cracks to significant delaminations, often occurring due to impact events or over time through environmental exposure. Unlike traditional materials, carbon fiber repairs require specialized knowledge and tools as it involves intricate structural bonding. The repair process starts with careful inspection to identify the extent of the damage. This is followed by preparation: cleaning the affected area, removing loose fibers, and ensuring a smooth surface for patching.
For minor damages like small cracks or chips, autoclave-cured carbon fiber prepregs are applied, offering precise restoration. More severe cases might necessitate frame straightening and structural reinforcement using advanced body shop services. This ensures the car’s safety and structural integrity post-repair, aligning with automotive collision repair best practices.
Tools and Materials Required for Carbon Fiber Repairs

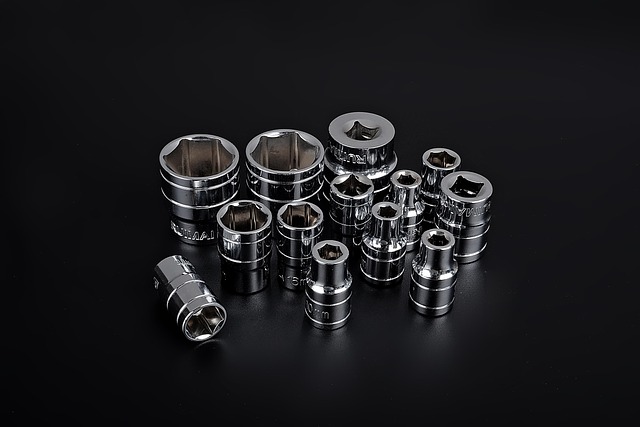
Before starting any carbon fiber repair methods, ensure you have all the necessary tools and materials. This includes specialized cutting tools such as precision knives and scissors designed for working with carbon fiber composite materials. You’ll also need sandpaper in various grits to smooth out surfaces and remove imperfections. Adhesives specifically formulated for carbon fiber repairs are crucial; these strong bonding agents help fuse broken or damaged sections back together seamlessly.
Additionally, a range of resins and hardeners are essential for filling gaps and restoring the structural integrity of your car’s carbon fiber components. Don’t forget protective gear like gloves, safety goggles, and a respirator mask to safeguard yourself from harmful fumes during the repair process. A collision repair shop often stocks these essentials, but for smaller, more targeted repairs, having this kit readily available can save time and ensure effective auto body work.
Step-by-Step Guide to Effectively Repairing Carbon Fiber Car Parts

Repairing carbon fiber car parts requires a meticulous approach to ensure the original aesthetics and structural integrity are maintained. Here’s a step-by-step guide:
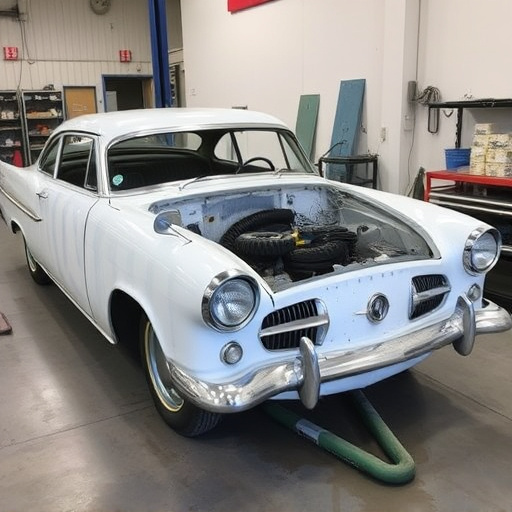
1. Inspect and Assess Damage: Begin by thoroughly examining the carbon fiber panel for cracks, chips, or dents. For minor auto dent repair, you can use a putty knife to gently push out any bulges. Major damage may require professional auto body services for precise measurements and preparation.
2. Prepare the Surface: Clean the damaged area with a mild detergent and water to remove grease, dust, and debris. Dry it completely before proceeding. This step is crucial for achieving a seamless finish during the repair process.
3. Mix and Apply Carbon Fiber Repair Compound: Use a high-quality carbon fiber repair compound designed specifically for automotive applications. Mix the compound according to the manufacturer’s instructions, ensuring a consistent texture. Apply a thin layer over the damaged area using a putty knife or spatula.
4. Smooth and Shape: As the compound dries, gently smooth the surface with fine-grit sandpaper, working in the direction of the carbon fiber layup. This step ensures an even finish that blends seamlessly with the surrounding material.
5. Repeat as Necessary: For more extensive repairs, repeat the compounding and sanding process until the damaged area is restored to its original shape and texture.
6. Paint and Final Touches: Once satisfied with the repair, apply a suitable primer and then paint over the repaired section to match the surrounding carbon fiber finish. Allow adequate drying time before driving or subjecting the vehicle to extreme conditions.
Carbon fiber repair methods are a game-changer for restoring your car’s sleek and durable exterior. By understanding the unique nature of carbon fiber damage and employing the right tools, you can effectively fix cracked or damaged panels, maintaining your vehicle’s aesthetic appeal and structural integrity. With a step-by-step approach, you’ll be able to expertly repair carbon fiber car parts, ensuring a seamless and long-lasting result.