


Anti-flutter foam, vital for vehicle structural integrity, degrades over time due to moisture, UV rays, and contaminants. Signs of damage necessitate immediate replacement during repairs to prevent future failures. Before replacing the foam, prepare tools (cutting tools, tape, drop cloths, PPE), ensure proper surface preparation, ventilation, follow manufacturer guidelines, local regulations, and use automotive-grade adhesive for a safe, effective, and aesthetically pleasing auto body painting process.
Looking to replace your anti-flutter foam? This comprehensive guide breaks down the process step-by-step, ensuring a successful DIY project. First, we’ll explore the purpose of anti-flutter foam and common issues that may arise. Then, learn about essential safety precautions and materials needed for the job. By following these clear instructions, you’ll tackle the replacement effectively, extending your mattress or furniture’s lifespan without professional help. Get ready to breathe new life into your space!
- Understanding Anti-Flutter Foam and Common Issues
- Gathering Materials and Safety Precautions
- Step-by-Step Replacement Process
Understanding Anti-Flutter Foam and Common Issues

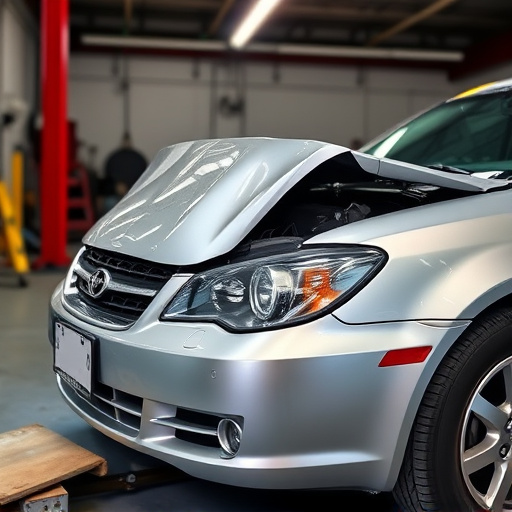
Anti-flutter foam is a crucial component in vehicle construction, particularly in auto glass mounting and fender repair. It plays a vital role in ensuring the structural integrity and safety of a vehicle’s exterior. However, over time, this foam can degrade due to exposure to moisture, UV rays, and environmental contaminants, leading to common issues such as cracking, shrinking, or loss of flexibility. When these problems arise, an anti-flutter foam replacement becomes necessary for proper auto body restoration.
Identifying the need for replacement is essential in maintaining a vehicle’s overall performance and safety standards. Common signs include visible damage, reduced adhesion of mounting components, or noticeable gaps in the foam structure. During an auto glass repair or fender repair process, if the anti-flutter foam is found to be compromised, it should be promptly replaced to guarantee the effectiveness of the repair and prevent future structural failures.
Gathering Materials and Safety Precautions

Before starting the anti-flutter foam replacement process, ensure you have all the necessary materials and take essential safety precautions. Gather high-quality replacement foam, a sharp knife or cutter, tape for masking, drop cloths to protect your work area, and personal protective equipment (PPE) including gloves, safety goggles, and a respirator mask. Safety is paramount; follow manufacturer guidelines and local regulations for handling and disposing of any materials.
In terms of auto body services, proper preparation is key. Clean the surface thoroughly, removing any debris or old foam remnants. Ensure adequate ventilation in your work area, as some replacement foams may emit strong odors. Put on your PPE to protect against dust, fumes, and potential allergens. With these measures in place, you’re ready to safely and effectively replace anti-flutter foam, enhancing the overall quality of your auto body painting process.
Step-by-Step Replacement Process

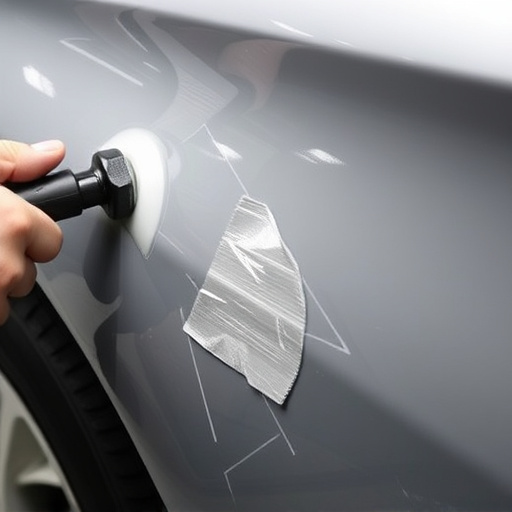
The process of replacing anti-flutter foam is a crucial step in vehicle restoration and auto detailing, offering an opportunity to enhance the overall aesthetics and structural integrity of your car. Here’s a breakdown of the steps involved in this precise procedure. First, you’ll need to gather all necessary tools and materials, including the replacement foam itself, adhesive suitable for automotive use, and protective gear to prevent any unwanted exposure during the process.
Begin by carefully removing the existing anti-flutter foam from the designated areas, ensuring a thorough understanding of its layout beneath the car’s exterior. Once exposed, thoroughly clean the surface to eliminate any debris or remnants of old adhesive. Apply the chosen adhesive according to the manufacturer’s instructions, paying close attention to the bonding agent’s curing time. Position the new anti-flutter foam carefully, aligning it precisely with the vehicle’s contours before securing it firmly in place.
Replacing anti-flutter foam is a straightforward process that can significantly improve your comfort and sleep quality. By understanding the common issues with this foam and following a simple, step-by-step guide, you can ensure a successful DIY project. Remember to prioritize safety and gather all necessary materials before beginning. With these steps, you’ll be well on your way to achieving a quieter, more peaceful sleep environment.