
Replacing a Tesla repeater camera is a precise process requiring skilled technicians. It involves adhering to Tesla's protocols, using specific tools, carefully disengaging connectors, and meticulously installing new cameras while preserving the vehicle's sensor network. Post-replacement checks ensure functionality, alignment, and safety compliance, including electrical connections, image quality, and frame inspection, with regular testing for optimal system operation.
Tesla owners often face challenges with their vehicle’s repeater cameras, necessitating a thorough understanding of the replacement process. This guide delves into the essential steps for successfully replacing a Tesla repeater camera while adhering to the manufacturer’s strict repair protocols. By following these detailed instructions, you’ll ensure proper functionality and maintain your car’s advanced driver-assistance systems (ADAS) integrity. Learn how to navigate this crucial task effectively.
- Understanding Tesla's Repeater Camera System and Its Importance
- Step-by-Step Guide: Replacing the Camera While Adhering to Repair Protocols
- Post-Replacement Checklist: Ensuring Proper Functionality and Compliance
Understanding Tesla's Repeater Camera System and Its Importance

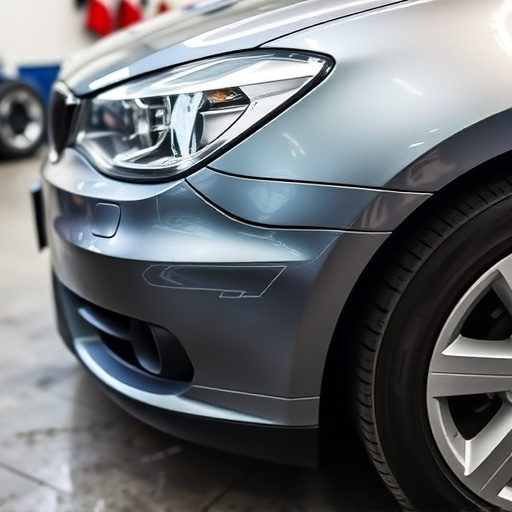
The Tesla repeater camera system is a crucial component of the vehicle’s safety and advanced driver-assistance systems (ADAS). These cameras are strategically placed around the car to provide a 360-degree view, enhancing visibility and enabling advanced features like parking assistance, lane departure warning, and automatic emergency braking. A Tesla repeater camera replacement must be approached with a deep understanding of this intricate system.
When it comes to replacing these cameras, especially after damage or during a car body restoration, auto frame repair, or auto body painting process, adhering to Tesla’s specific repair protocols is essential. This ensures not only the functional integrity of the vehicle but also its safety compliance and advanced technology functionality. Skilled technicians are trained to handle these replacements meticulously, preserving the car’s sophisticated sensor network.
Step-by-Step Guide: Replacing the Camera While Adhering to Repair Protocols

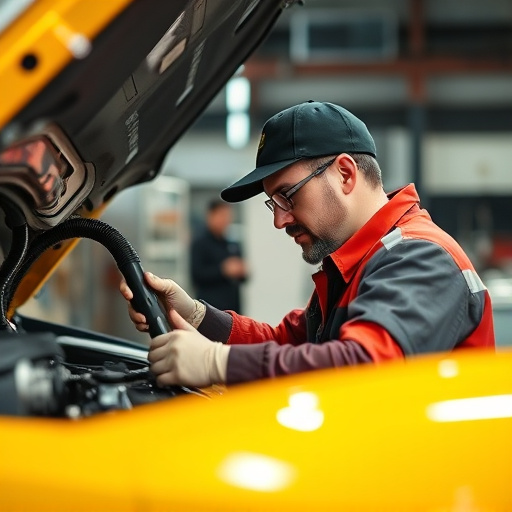
Replacing a Tesla repeater camera involves careful adherence to the company’s repair protocols for optimal results and safety. Here’s a straightforward guide for auto collision repair specialists undertaking this task. Begin by ensuring proper tools are at hand, including specialized screwdrivers and torx drivers suitable for Tesla models. Next, power down the vehicle and locate the repeater camera unit, typically found near the rear view mirror or in the A-pillar. Disengage any connectors safely using a circuit tester to avoid short circuits.
Demounting requires precision; carefully remove the camera housing by unscrewing any securing bolts. Once exposed, gently pull out the old camera and inspect the lens for damage. Clean the area thoroughly, ensuring no debris remains. Install the new camera, aligning it precisely, then securely fasten in place using the provided hardware. Reconnect all power and signal cables, double-checking their integrity. Finally, test the repeater camera’s functionality, verifying its clear image transmission across the vehicle’s display system, just as you would during a collision repair process for optimal customer satisfaction.
Post-Replacement Checklist: Ensuring Proper Functionality and Compliance

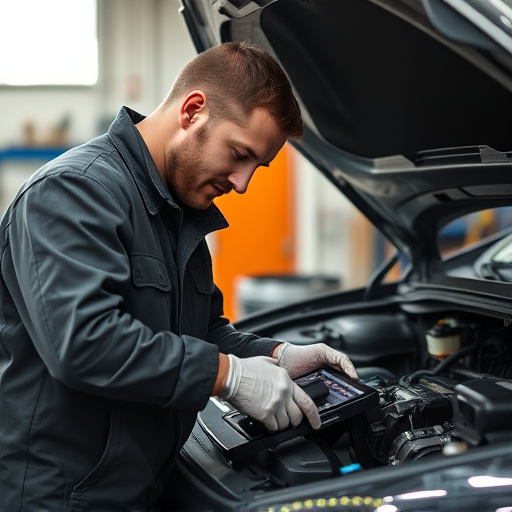
After a Tesla repeater camera replacement, it’s crucial to verify proper functionality and adherence to Tesla’s repair protocols. This post-replacement checklist includes checking all connections for any loose or damaged wires, ensuring the camera captures clear images both day and night, and confirming the alignment of the camera with the vehicle’s existing systems.
Additionally, verifying compliance with collision repair services and auto body work standards is essential. This involves inspecting the frame for any misalignments after auto frame repair, ensuring all components are securely fastened, and confirming that the replacement has not affected the overall safety and performance of the vehicle. Regular testing and calibration might be needed to guarantee optimal operation, especially if the repair involved complex auto body work or intricate electronic systems.
When undertaking a Tesla repeater camera replacement, adhering to Tesla’s repair protocols is paramount. By following the step-by-step guide provided and completing the post-replacement checklist, you can ensure the new camera functions optimally and complies with the vehicle’s advanced safety systems. Remember, proper installation is crucial for maintaining Tesla’s performance standards and enhancing road safety.