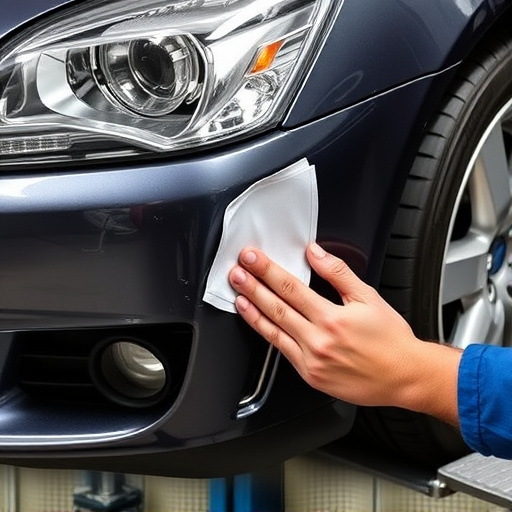
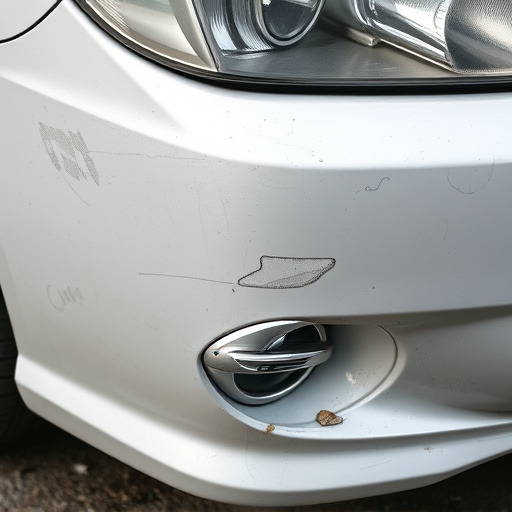

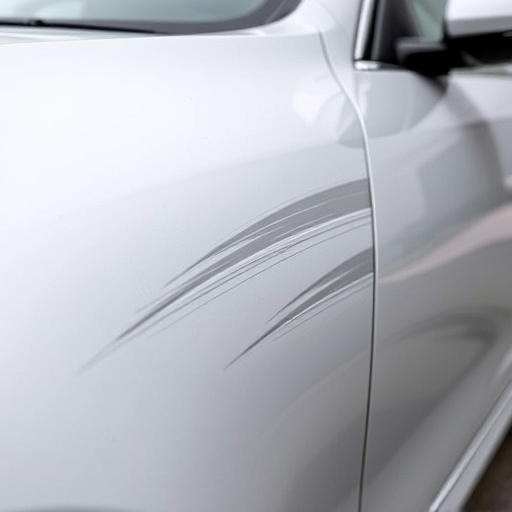


To undertake effective vehicle dent fixing, gather essential tools like dent puller, hammer, mallet, sandpaper, buffer, car wax, screwdrivers, and pliers. Prepare a well-lit, safe workspace and wear protective gear. Key tools include a putty knife for dent removal and shaping bodywork, achieving a smooth finish comparable to auto body painting for professional collision repair results. Techniques involve cleaning, pushing down on dents, filling with putty, sanding, and final painting for enhanced vehicle aesthetics and value.
Vehicle dent fixing is a skill that every car owner should know. This step-by-step guide is designed for beginners looking to tackle minor dents and dings themselves. We’ll walk you through gathering the necessary tools, assessing the damage, and performing the repair from start to finish. Learn how to identify different types of car dents, choose the right remover, and apply body putty for a seamless finish. Get ready to restore your vehicle’s look with confidence!
- Gathering the Necessary Tools and Materials
- – List of essential tools for dent fixing
- – Types of putty knives and their uses
Gathering the Necessary Tools and Materials
Before tackling any vehicle dent fixing, it’s crucial to gather the right tools and materials. This includes a dent puller (also known as a plunger or extractor), a hammer, plastic or rubber mallet, sandpaper (both coarse and fine grit), a buffer or polisher, car wax, and rags. Additionally, consider having a set of screwdrivers and pliers on hand for any loose parts or additional adjustments. Ensuring you have these essentials prepared beforehand will make the dent fixing process smoother and more efficient, contributing to better results in your vehicle restoration efforts.
For effective vehicle dent fixing, safety should never be compromised. Wear protective eyewear and gloves to shield yourself from debris and potential injury. A well-lit workspace is also essential for precision and clarity. With the right tools at hand and safety measures in place, you’re ready to begin transforming your damaged auto body into a sleek, imperviable surface – all part of top-notch auto repair services.
– List of essential tools for dent fixing
Before tackling any vehicle dent fixing, ensure you have all the necessary tools for the job. Here’s a list to get you started: dent puller, hammer, pry bar, putty knife, sandpaper (grit 400-600), auto body filler, primer, paint sprayer or brush, and clear coat. These tools are essential for effectively removing dents, shaping the vehicle bodywork, and ensuring a smooth finish comparable to auto body painting.
The right tools make all the difference in achieving professional results during vehicle collision repair. A dent puller helps extract the dent from the metal, while a hammer and pry bar facilitate gentle yet precise manipulation. Sandpaper is crucial for smoothing out any imperfections before applying filler, and a putty knife ensures even distribution of filler. Once the area is repaired, a primer acts as a base for paint, and a paint sprayer or brush completes the restoration, giving your vehicle a like-new look.
– Types of putty knives and their uses
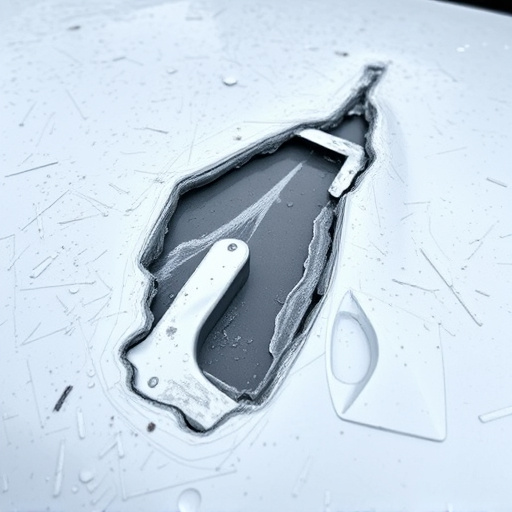
When it comes to vehicle dent fixing, the putty knife is a versatile tool that plays a crucial role in both dent removal and auto detailing. There are various types of putty knives designed for different applications. For instance, flat-tipped knives are ideal for spreading large amounts of filling compound evenly over dents, while curved or V-shaped blades are better suited for reaching hard-to-access areas and making precise cuts during the shaping process. Angular or square-edged knives are excellent for smoothing out putty once it’s been applied, allowing for a seamless finish that blends in with the car’s original surface.
Understanding how to use these tools effectively is key to achieving professional-looking collision repair. Beginners should start by cleaning and preparing the dented area thoroughly before applying any compound. Then, using a flat-tipped knife, they can gently push down on the dent to pop it out slightly, creating a dimple that will serve as a starting point for filling. Subsequent steps involve carefully filling in the dent with putty, allowing it to dry, sanding smooth, and eventually painting over the repaired area for a flawless finish, enhancing overall vehicle aesthetics and value in the process of vehicle dent fixing.
Vehicle dent fixing can seem daunting, but with the right tools and a step-by-step approach, beginners can achieve professional results. By gathering the essential tools, such as putty knives of various sizes, and understanding their uses, you’re well on your way to repairing minor dents and dings. Remember, practice makes perfect, so don’t be afraid to experiment and refine your skills. With time and patience, you’ll become proficient in vehicle dent fixing, saving money and maintaining the look of your car.