

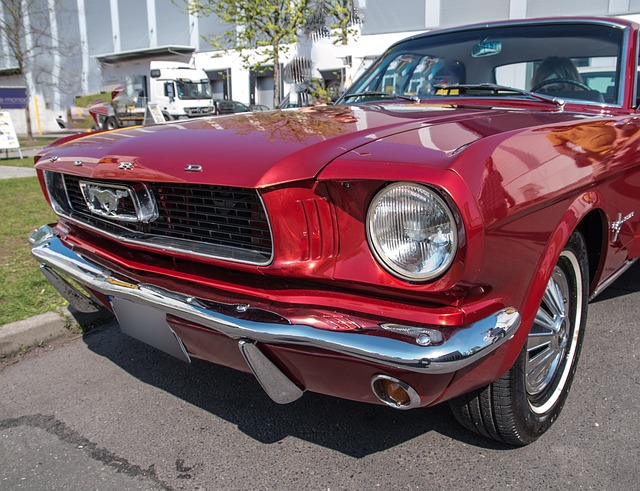

Tesla clear coat restoration involves a meticulous process of inspection, dent removal (e.g., paintless dent repair), buffing damaged areas, and precise blending for seamless integration. Achieving optimal results requires specialized tools, careful color matching, and step-by-step techniques like cleaning, sanding, restorer application, and final buffing to enhance both aesthetics and durability.
“Unveil the secrets behind revitalizing your Tesla’s sleek exterior with our comprehensive guide to Tesla clear coat restoration. This article delves into the intricate process of repairing and restoring your vehicle’s clear coat, ensuring a seamless blend with the existing finish.
From understanding the fundamentals of clear coat restoration to mastering advanced blending techniques, we provide practical tips for achieving exceptional results. Discover the best practices to ensure your Tesla’s clear coat not only looks new but also stands the test of time, enhancing its overall allure.”
- Understanding Tesla Clear Coat Restoration: The Basics
- Post-Repair Blending Techniques for Seamless Results
- Tips and Best Practices for Achieving Optimal Clear Coat Restoration
Understanding Tesla Clear Coat Restoration: The Basics
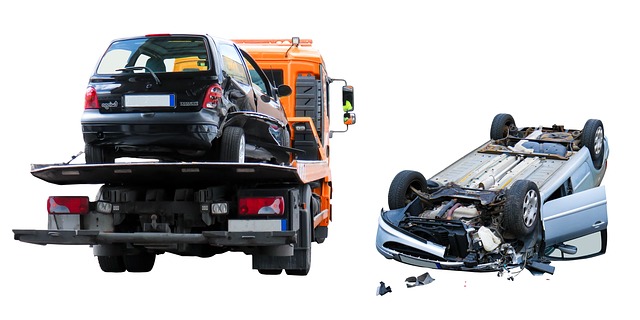
Tesla clear coat restoration is a meticulous process designed to revive the sleek exterior of Tesla vehicles, addressing wear and tear caused by environmental factors, minor dents, or even post-collision damage. The clear coat, a protective layer over the paintwork, can chip, fade, or become scratched, impacting the vehicle’s overall aesthetics. Restoring this coating involves specialized techniques to remove imperfections, blend new patches seamlessly with existing paint, and apply a high-quality clear coat finish.
This process begins with thorough inspection and preparation, ensuring the surface is clean and free from contaminants. Dent removal techniques, including paintless dent repair or more intensive bumper repair methods, are employed to address any visible damage. Skilled technicians then use fine sandpaper and compounds to gently buff away damaged areas, revealing fresh paint beneath. Post-repair blending ensures that the restored sections harmonize perfectly with the rest of the vehicle’s finish, maintaining its original appearance and smooth, glossy clear coat.
Post-Repair Blending Techniques for Seamless Results

After completing Tesla clear coat restoration, mastering post-repair blending techniques is paramount to achieve seamless results that match the vehicle’s original finish. This meticulous process involves using specialized tools and techniques to blend away repair lines, ensuring a flawless transition between repaired and undamaged areas. Skilled technicians employ various blending methods, from manual sanding with fine grit papers to advanced dual-action machines, depending on the extent of damage and desired smoothness.
The goal is to create an invisible join between the repaired panel and its surroundings. By carefully selecting and matching paint colors, along with precise application techniques, these professionals disguise any evidence of previous car repair services or vehicle body repairs. This intricate blending process requires patience and precision, but the end result—a restored car that looks as good as new—is well worth the effort.
Tips and Best Practices for Achieving Optimal Clear Coat Restoration
Achieving optimal Tesla clear coat restoration requires a meticulous approach and adherence to best practices. Before starting, ensure your workspace is well-ventilated and equipped with appropriate safety gear, as the process involves working with specialized chemicals. Begin by thoroughly cleaning the damaged area, removing any dirt, grease, or debris using mild soap and deionized water. This step is crucial for a successful restoration.
Next, carefully sand the clear coat to create a smooth surface without damaging the underlying paint. Utilize fine-grit sandpaper designed for clear coat restoration. After sanding, wipe down the area with a clean microfiber cloth to remove any dust particles. The key to blending and repairing is patience. Apply the restorer using a small, detailed applicator, following the product’s instructions precisely. Allow it to dry completely before using a high-quality buffer to achieve a seamless finish, matching the surrounding clear coat. This process ensures your Tesla retains its glossy, protective layer, enhancing both aesthetics and durability.
Tesla clear coat restoration is a meticulous art that, when done right, can revive the sleek and protective finish of your vehicle. By mastering post-repair blending techniques and adhering to best practices, you can achieve seamless results that match the original factory specifications. With the right tools, knowledge, and attention to detail, you’ll not only enhance the appearance of your Tesla but also protect its value for years to come.