


Hood dent removal is a DIY process for car owners to fix dings at home, saving time and money. It involves assessing damage, gathering tools like dent pullers, heating metal with heat guns, and using specialized tools to lift and remove dents while avoiding further damage to modern cars' curves. Ensure having necessary supplies like protective gear, automotive-grade putty and primer, and properly prepare the work area before starting. DIY hood dent removal is cost-effective for minor dents when done carefully and correctly.
Learn how to effectively remove hood dents at home with this step-by-step guide. Before you begin, understand the process of hood dent removal, which involves gently pushing out the dented area until it returns to its original shape. Gather essential tools and materials, including a mallet, clamp, and plastic hammer. Follow our simple instructions for a successful and safe dent removal experience.
- Understanding Hood Dent Removal Process
- Gather Tools and Materials Needed
- Step-by-Step Guide for Effective Removal
Understanding Hood Dent Removal Process

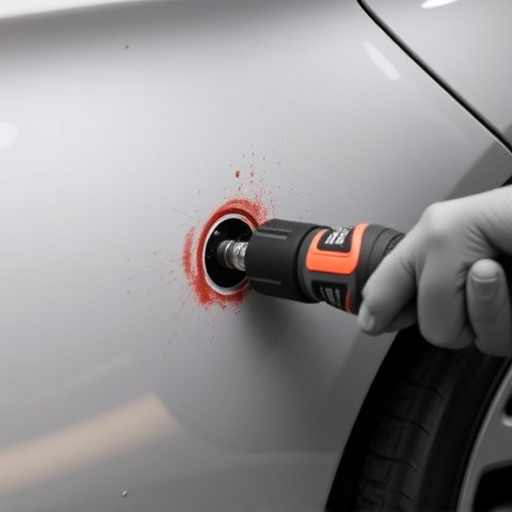
Hood dent removal is a process that allows you to fix dents or dings on your vehicle’s hood at home, potentially saving you the cost and time of visiting a professional repair shop. Before attempting this DIY project, understanding the basic steps involved in hood dent removal is crucial. The process typically begins with identifying the extent of the damage and gathering the necessary tools, such as a dent puller or a pry bar, which are used to gently press out the depressed area of the metal.
This method involves creating a small gap under the dented panel using heat guns or hair dryers to warm up the metal, making it more pliable. Once heated, specialized tools are applied to lift and remove the dent. It’s important to be cautious during this stage to avoid further damaging the hood or surrounding panels, especially when dealing with complex shapes or curves common in modern automotive designs. Proper technique and safety precautions are key, as a fender bender or auto glass replacement isn’t always an option for minor dents, making do-it-yourself hood dent removal both feasible and cost-effective for many vehicle owners.
Gather Tools and Materials Needed

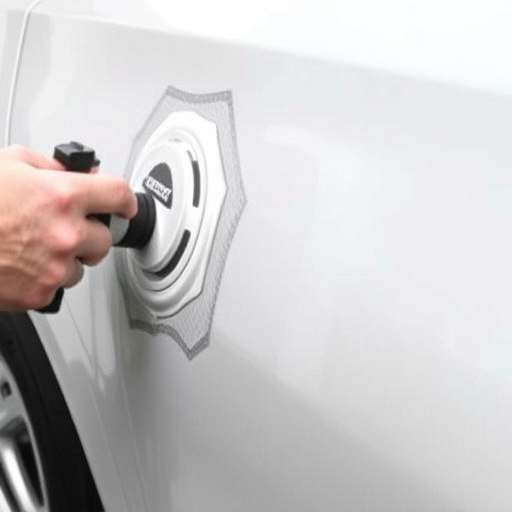
Before you begin any hood dent removal process, it’s crucial to gather all the necessary tools and materials. This DIY project requires specific items tailored for car body restoration, ensuring a seamless and effective fix. Start by collecting a dent puller or a set of pliers designed for this purpose; these will be your primary tools for gently removing the dent. Additionally, you’ll need some rubber mallets, which offer precise control during the process.
For an optimal classic car restoration or any vehicle repair service, consider having a supply of automotive-grade putty and primer to fill and smooth out the dented area after removal. Don’t forget protective gear, such as gloves and safety glasses, to safeguard yourself from debris and potential scratches. Having these tools ready will not only streamline your work but also contribute to achieving a professional-looking hood dent removal result.
Step-by-Step Guide for Effective Removal
Performing hood dent removal at home can be a cost-effective solution for minor car dents and dings. Here’s a step-by-step guide to ensure effective results:
1. Assess the Damage: Begin by inspecting the dent carefully. If it’s a small, shallow dent, it might be suitable for DIY removal. However, severe or deep dents may require professional collision damage repair. Gather all necessary tools like a dent puller, mallet, and a can of compressed air.
2. Prepare Your Work Area: Park your car in a well-lit, clean area away from direct sunlight to avoid heat-related issues during the removal process. Lay down protective cloths or tarps on the ground beneath and around the dented area for easy cleanup. Ensure good ventilation as some products used may have strong fumes.
Performing hood dent removal at home is a feasible option with the right knowledge and tools. By understanding the process, gathering necessary materials, and following a step-by-step guide, you can effectively restore your vehicle’s appearance without breaking the bank. Hood dent removal is a skill worth having, offering both cost savings and convenience for minor dents and dings.