


The Tesla MCU (Microcontroller Unit) is a key component for safety and functionality. After an accident, precise repair of the MCU is crucial for restoring driver interface access and vehicle performance. This involves careful inspection, skilled technician intervention, replacement of the Modular Control Unit (MCU), proper installation, testing, and calibration to ensure a seamless post-collision driving experience.
In the event of a collision, restoring access to a Tesla’s driver interface is crucial. The Tesla MCU (Microcontroller Unit) plays a pivotal role in controlling this system, making its repair a specialized process. This article guides you through understanding the Tesla MCU and its functions, evaluating damage post-collision, and offers a comprehensive step-by-step guide for replacing the MCU to regain access to your vehicle’s critical driver interface features.
- Understanding Tesla MCU and Its Role in Driver Interface
- Evaluating Damage After a Collision for MCU Repair
- Step-by-Step Guide to Restoring Access via MCU Replacement
Understanding Tesla MCU and Its Role in Driver Interface

The Tesla MCU (Microcontroller Unit) is a pivotal component that serves as the brain of the vehicle’s driver interface system. It controls and manages various functions, including display, navigation, climate control, and vehicle settings. When a Tesla experiences a collision, proper MCU repair after collision is essential to ensure the safety and functionality of these critical systems.
In the event of an accident, the MCU can sustain damage, leading to issues with the driver’s access to vital information and controls. Autobody repairs that focus on MCU restoration involve skilled technicians who diagnose and fix any electronic or software problems within the unit. Efficient vehicle repair services for Tesla MCU ensure that the vehicle not only regains its aesthetic appeal through bodywork repairs but also maintains a seamless, functional driver interface, enhancing the overall driving experience and safety features of the vehicle.
Evaluating Damage After a Collision for MCU Repair

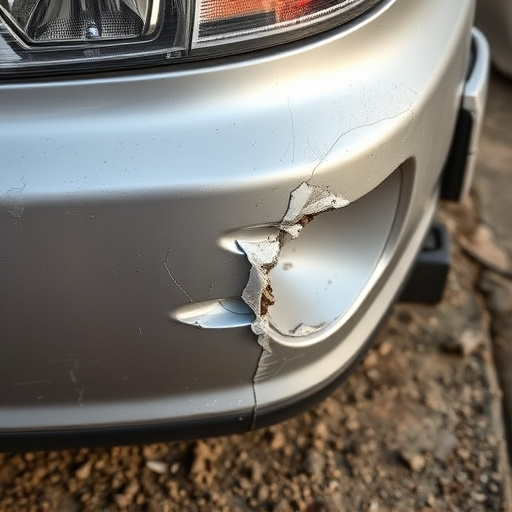
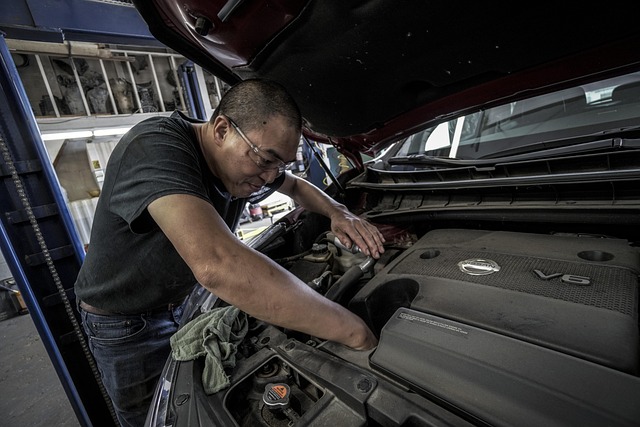
After a collision, evaluating the damage to a Tesla’s MCU (Multi-Computer Unit) is crucial for restoring driver interface access. The first step involves a thorough inspection of the vehicle’s exterior and interior, looking for any visible signs of impact or misalignment. This includes checking for car dent removal, as even minor dents can disrupt the delicate electrical connections within the MCU. In cases of more severe collision damage repair, it may be necessary to disassemble components to assess internal harm.
Professional mechanics skilled in Tesla MCU repair after collision will also consider subtle symptoms like unexpected behavior from the touch screen or dashboard. These indicators can point to underlying issues that might have been caused by collision-related vibrations or accelerations. Accurately identifying these problems is essential for effective car body repair, ensuring that every aspect of the MCU functions as intended before reinstalling it in the vehicle.
Step-by-Step Guide to Restoring Access via MCU Replacement

Restoring access to a Tesla’s driver interface after a collision often involves replacing the MCU (Modular Control Unit), a critical component for vehicle restoration. Here’s a step-by-step guide on how to achieve this process effectively:
1. Safety First: Before beginning, ensure the vehicle is securely parked and all power sources are disconnected. Safety glasses and protective gear are recommended as you’ll be dealing with sensitive electronics. This step is crucial in both vehicle restoration and preventing accidental shorts or damage.
2. Identify and Access the MCU: Locate the MCU, typically found underneath the steering wheel column. Carefully remove any surrounding components, taking note of their positions for later reassembly. The MCU needs to be replaced with a new, compatible unit. For an auto repair near me that specializes in Tesla vehicles, this step can be accurately navigated by experienced technicians.
3. Install New MCU: Insert the new MCU into its designated slot, ensuring it fits securely. Connect all necessary wires and harnesses according to the vehicle’s schematic. This process requires precision and a keen understanding of automotive repair.
4. Test and Verify: After reassembling the surrounding components, power on the Tesla. The driver interface should come to life, indicating successful automotive repair. Conduct thorough testing to ensure all functions operate as intended.
5. Calibration: In some cases, post-repair calibration may be necessary to optimize sensor performance and ensure accurate readings. This step is vital for a seamless driving experience after a Tesla MCU repair after collision.
After a collision, restoring access to a Tesla’s driver interface through MCU (Microcontroller Unit) repair is essential for ensuring safety and functionality. By understanding the critical role of the MCU in controlling vehicle systems and following a structured replacement process, owners can effectively navigate MCU repair after a crash. This article has provided insights into the Tesla MCU, damage evaluation, and a step-by-step guide to restoration, empowering individuals to take charge of their vehicle’s post-collision recovery.