


Assess Tesla Model 3 front fascia damage for dents and misalignments, using a flashlight for hidden marks. Repair with PDR or professional techniques if severe. Gather authentic Tesla replacement parts and skilled services for complex repairs. Meticulously inspect, heat, weld, sand, prime, and paint for precise restoration.
“Experience damage to your Tesla Model 3’s front fascia after towing or lift operations? This comprehensive guide offers a detailed step-by-step approach to restoring its sleek design. We’ll walk you through assessing the extent of the harm, gathering the required tools and parts, and expertly repairing your vehicle’s front fascia. By following these easy-to-understand instructions, you’ll return your Tesla Model 3 to its original, pristine condition.”
- Assessing Towing or Lift Damage to Tesla Model 3 Front Fascia
- Gathering Necessary Tools and Parts for Repair
- Step-by-Step Guide to Restoring Tesla Model 3 Front Fascia
Assessing Towing or Lift Damage to Tesla Model 3 Front Fascia

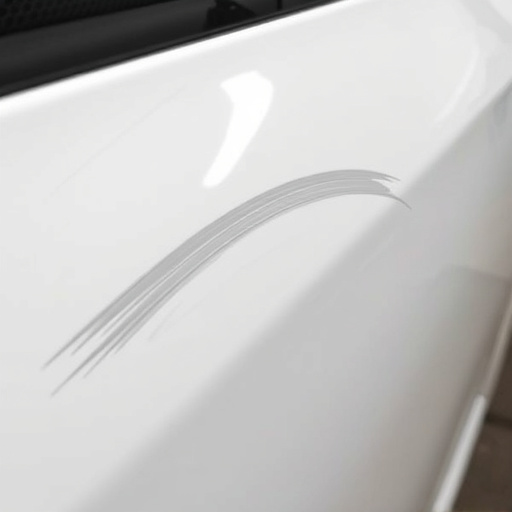
When it comes to assessing damage on a Tesla Model 3 front fascia following towing or lift operations, meticulous inspection is paramount. Start by visually examining for any visible dents, scratches, or misalignments. These can often be spotted with the naked eye, but for more detailed analysis, use a flashlight to check for hidden impact marks or deformations.
Consider visiting an auto collision center where professionals equipped with specialized tools can perform dent removal techniques like PDR (Paintless Dent Repair) or more invasive methods depending on the severity of the damage. Remember, proper assessment and repair are crucial to not only restore the aesthetic appeal of your Tesla Model 3 front fascia but also ensure its structural integrity for safe driving.
Gathering Necessary Tools and Parts for Repair

When preparing to undertake a Tesla Model 3 front fascia repair after towing or lift damage, it’s crucial to gather all necessary tools and parts. This process begins with assessing the extent of the damage, which could range from minor dents to more severe buckles or bends. Once the severity is determined, specific tools like impact wrenches, precision screwdrivers, and plastic welding equipment may be required. For a seamless repair, obtaining authentic Tesla replacement parts is essential; these can include front fascia panels, brackets, and any other affected components.
Additionally, considering professional vehicle repair services can be invaluable, especially for more complex repairs. Skilled technicians have the expertise to handle intricate bumper repair and car dent repair tasks, ensuring your Tesla Model 3 regains its original aesthetic appeal. Remember that proper preparation, including gathering the right tools and parts, is key to achieving a successful and lasting front fascia repair.
Step-by-Step Guide to Restoring Tesla Model 3 Front Fascia

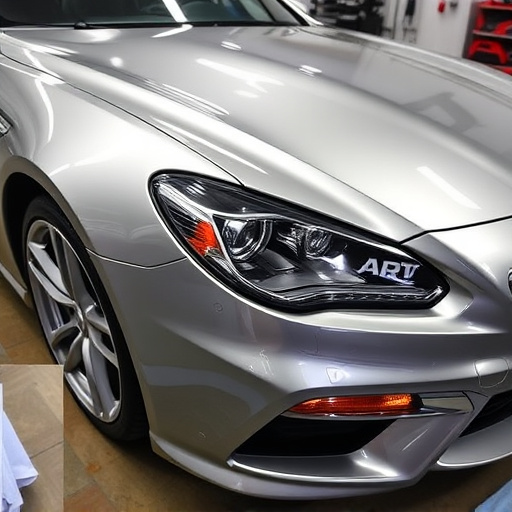
Restoring a Tesla Model 3 front fascia after towing or lift damage requires careful attention to detail. Start by thoroughly inspecting the fascia for any cracks, dents, or misalignments. Use a torch or heat gun to warm up the plastic, making it easier to manipulate and bend back into its original shape. This step is crucial in ensuring a seamless fit upon completion of the repair.
Next, gather your tools: plastic welding equipment (such as a hot wire tool or heated knife), sandpaper, primer, and paint. Carefully remove any debris trapped within the damaged area using fine-grit sandpaper. Clean the surface thoroughly with a degreaser to prepare it for bonding. Apply a thin layer of automotive-grade primer, allowing it to dry completely. Finally, use high-quality paint specific to Tesla Model 3 finishes, matching the original color precisely. This meticulous process ensures your vehicle’s front fascia is restored to its pre-collision condition, akin to a Mercedes Benz repair, without compromising aesthetics.
The process of repairing a Tesla Model 3’s front fascia after towing or lift damage can be completed efficiently with the right tools and guidance. By following the outlined steps, owners can restore their vehicle’s aesthetic appeal and protect its structural integrity. With a focus on precision and attention to detail, you’ll have your Tesla Model 3 looking as good as new in no time. Remember, prompt action after any impact is key to minimizing damage and ensuring a seamless repair.