


Common issues in Mercedes Burmester sound systems include audio quality degradation, faulty wiring, and aging components. Early identification is crucial for professionals and enthusiasts engaging in repair to restore immersive audio experiences. Skilled technicians use specialized tools for precise results, following a systematic approach that includes thorough inspection, disassembly, cleaning, testing, replacing parts, reassembling, and calibrating for optimal sound reproduction.
Mercedes Burmester sound systems are renowned for their superior audio quality, but over time, they can develop issues. This article guides you through the best tools and essential steps for successful Mercedes Burmester sound repair projects. We’ll cover identifying common problems, from faulty speakers to damaged amplifiers, and equip you with a toolkit for precise repairs. Learn how to restore your vehicle’s audio to its optimal state, ensuring a rich and immersive listening experience.
- Identifying Common Mercedes Burmester Sound Issues
- Essential Tools for Precise Repairs
- Step-by-Step Guide to Restoring Audio Quality
Identifying Common Mercedes Burmester Sound Issues

Many Mercedes Burmester sound systems over the years have developed common issues that can be addressed through meticulous repair work. Understanding these problems is crucial for anyone undertaking a Mercedes Burmester sound repair project, whether it’s part of a vehicle restoration or carried out by a professional collision repair shop. One of the most frequent challenges is degradation in audio quality, which can manifest as distorted sounds, loss of bass response, or an overall muffled listening experience. This often stems from damaged speakers, faulty wiring, or a failing amplifier.
Another common issue, especially in older systems, is the failure of components due to age and exposure to environmental factors. Hum, static noise, or even sudden system shutdowns can indicate problems with capacitors, resistors, or other internal parts. For those involved in automotive restoration, identifying these issues early on can save time and resources in the long run. Proper diagnosis is key to successful Mercedes Burmester sound repair, ensuring that the system functions optimally and delivers the immersive audio experience for which Mercedes-Benz is renowned.
Essential Tools for Precise Repairs

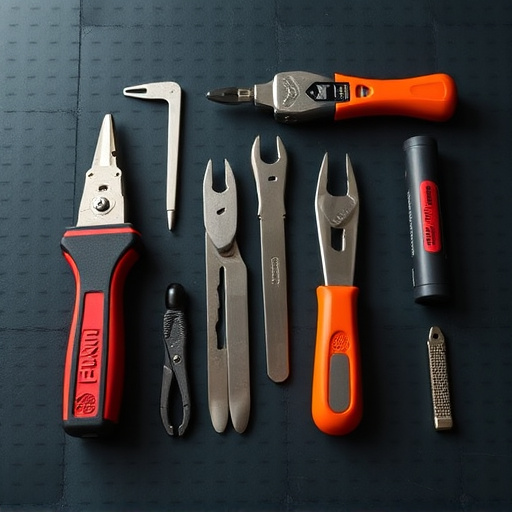
When tackling Mercedes Burmester sound repair projects, having the right tools is paramount for achieving precise and professional results. Skilled technicians rely on a combination of specialized equipment to effectively diagnose and fix issues within the complex audio systems of these high-end vehicles. At the core of any comprehensive toolkit are essential items designed for meticulous work. These include high-quality multimeters for accurate voltage measurements, which help identify faulty components, and precision screwdrivers tailored to the specific hex head sizes found in Burmester sound systems.
Additionally, an investment in top-tier soldering irons and desoldering pumps facilitates seamless re-soldering of connectors and delicate circuit repairs. For those delving into automotive restoration specifically for Mercedes vehicles, considering a set of fine sandpaper varieties is crucial, as it allows for gradual refinement during the auto painting and bodywork processes, ensuring a flawless finish when integrating replacement parts or repairing damaged speakers.
Step-by-Step Guide to Restoring Audio Quality

Restoring audio quality in a Mercedes Burmester sound system involves a meticulous process that requires the right tools and expertise. Here’s a step-by-step guide for tackling this challenging yet rewarding task, focusing on Mercedes Burmester sound repair:
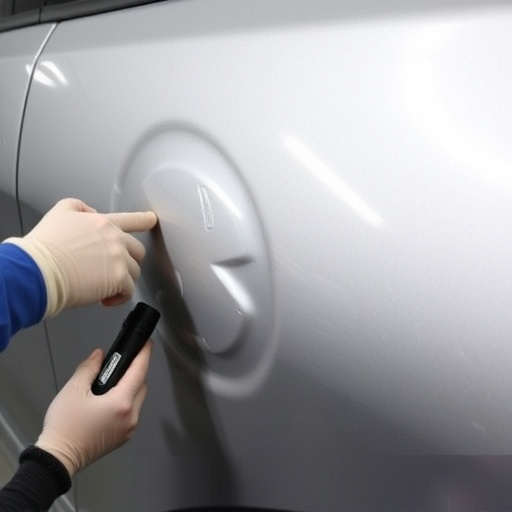
1. Inspect and Assess Damage: Begin by thoroughly examining the vehicle’s bodywork around the audio system. Look for any signs of collision damage repair or wear and tear that might affect sound quality. Check speakers, wires, and components for cracks, corrosion, or loose connections. This initial step is crucial as it helps identify potential issues that could be impacting the overall audio performance.
2. Disassemble and Clean: Once identified, carefully disassemble affected parts, taking note of how each component is connected. Use specialized tools designed for Mercedes Burmester sound repair to avoid damaging delicate parts. Proceed with cleaning all components using recommended cleaners to remove dust, dirt, or any residue that might interfere with sound transmission. This meticulous process ensures optimal performance when reassembling.
3. Test and Replace Components: Test each component individually to pinpoint faulty parts. Advanced diagnostic tools can help identify issues within the wiring harness or speaker drivers. Replace any damaged or aging components with genuine Mercedes Burmester parts for precise audio reproduction. Remember, even minor adjustments in auto glass repair or collision damage repair can significantly affect sound quality.
4. Reassemble and Calibrate: After replacing necessary parts, carefully reassemble the system, ensuring all connections are secure. Calibration is a crucial step where specialized equipment adjusts the audio system to its optimal settings, delivering the best possible sound experience for your vehicle.
When tackling Mercedes Burmester sound repair projects, having the right tools is essential. By identifying common issues and using precise techniques, you can effectively restore audio quality in your vehicle. With the essential tools outlined in this guide, you’ll be equipped to navigate through any challenges that arise. Remember, a successful repair relies on attention to detail and the proper equipment—so dive into these steps, and witness the transformation of your car’s sound system.