


Advanced Driver Assistance Systems (ADAS) calibration relies on electronic diagnostics tools connecting to OBD ports for real-time sensor data access. Technicians perform diagnostic tests, adjust components like cameras and radar units through dynamic road tests, enhancing safety features. Challenges include misaligned sensors leading to potential collision risks; troubleshooting involves checking positioning, software updates, reference targets, and meticulous body work. Electronic diagnostics collision reports aid in identifying issues for optimal ADAS performance and enhanced road safety.
In today’s automotive landscape, Advanced Driver Assistance Systems (ADAS) are revolutionizing safety. Technicians leverage powerful electronic diagnostics tools to calibrate these systems accurately, ensuring optimal performance. This article guides you through the intricate process of ADAS calibration, using a step-by-step approach and addressing common challenges encountered during the procedure. By understanding these techniques, technicians can effectively navigate the complex world of electronic diagnostics collision management, enhancing vehicle safety.
- Understanding ADAS and Electronic Diagnostics Tools
- Calibration Process: Step-by-Step Guide
- Common Challenges and Troubleshooting Tips
Understanding ADAS and Electronic Diagnostics Tools

Advanced Driver Assistance Systems (ADAS) are revolutionizing the way we drive, with features like adaptive cruise control, lane-keeping assist, and automatic emergency braking. These systems rely on a complex interplay of sensors, cameras, and software to enhance safety and convenience. To ensure these technologies function optimally, technicians employ electronic diagnostics tools that play a crucial role in ADAS calibration.
Electronic diagnostics tools are versatile devices used in car repair shops and auto collision centers to identify and rectify issues within a vehicle’s electronic systems. These tools allow technicians to connect directly to a car’s onboard diagnostic (OBD) port, retrieve real-time data from sensors, and diagnose problems with precision. In the context of ADAS, these tools are essential for calibrating sensor readings, verifying system performance, and ensuring proper integration between various components. By leveraging electronic diagnostics, auto repair shops can deliver highly accurate ADAS calibration services, ultimately contributing to safer operation on the road.
Calibration Process: Step-by-Step Guide

The calibration process for ADAS (Advanced Driver Assistance Systems) involves a meticulous step-by-step guide that ensures optimal performance and safety. It begins with connecting an electronic diagnostics tool to the vehicle’s OBD-II port, allowing technicians to access real-time data from various sensors and modules. This initial step is crucial as it enables them to identify any existing issues or discrepancies in the system.
Technicians then proceed by performing a series of diagnostic tests using the tool. These tests involve simulating specific driving scenarios and checking sensor responses, such as camera and lidar calibration checks. Any anomalies detected during this phase are addressed before proceeding. Once the diagnostics confirm the system’s readiness, technicians make precise adjustments to the ADAS components, including cameras, radar units, and control modules, ensuring they work in harmony. This meticulous process involves calibrating each individual sensor, fine-tuning algorithms, and verifying performance through dynamic road tests, ultimately leading to a vehicle repair that enhances safety features like adaptive cruise control and lane departure warning.
Common Challenges and Troubleshooting Tips

Technicians face several common challenges when calibrating Advanced Driver Assistance Systems (ADAS) using electronic diagnostics tools. One significant hurdle is ensuring accurate sensor readings, as even minor discrepancies can lead to improper system functionality and potential safety risks. For instance, misaligned cameras or faulty LiDAR sensors might result in incorrect perception of the environment, affecting features like lane departure warning or automatic emergency braking.
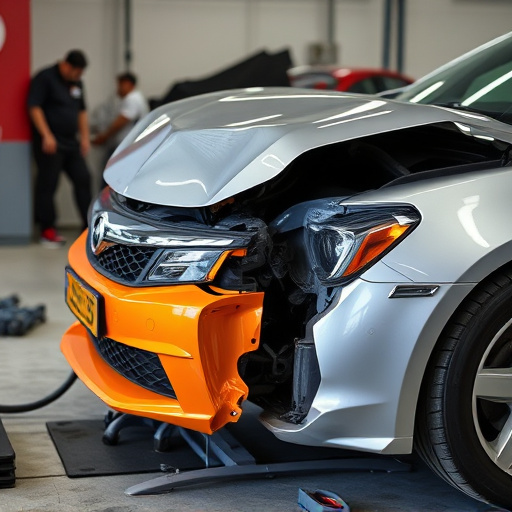
Troubleshooting tips include double-checking sensor positioning and calibration standards, regularly updating diagnostic software to account for new vehicle models and firmware updates, and utilizing reference targets during testing to verify system performance. In cases of persistent issues, examining the electronic diagnostics collision reports can provide valuable insights into potential sources of malfunctions. Additionally, performing thorough frame straightening and meticulous automotive body work when necessary ensures optimal sensor positioning, enhancing the accuracy of ADAS calibrations.
The integration of Advanced Driver Assistance Systems (ADAS) in modern vehicles has revolutionized road safety. Technicians play a pivotal role in ensuring these systems function optimally through precise calibration using specialized electronic diagnostics tools. By following a structured calibration process and addressing common challenges, professionals can maintain the integrity of ADAS, ultimately contributing to safer driving experiences. Efficient troubleshooting techniques empower technicians to swiftly resolve issues, emphasizing the significance of their expertise in the realm of electronic diagnostics collision prevention.