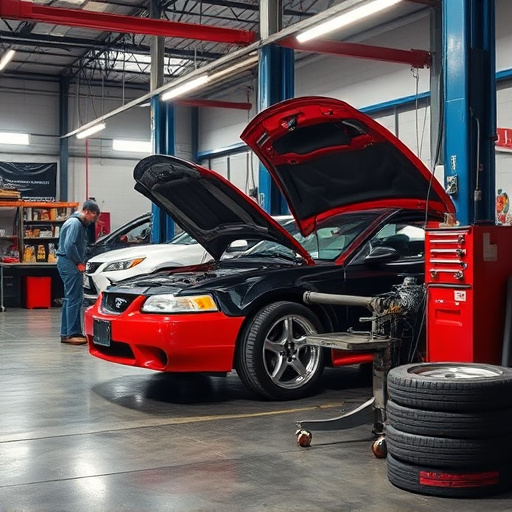

After a collision, thoroughly check your vehicle's starter system for damage. Inspect for visible signs and listen for abnormal noises indicating issues with batteries, motors, or cables. Conduct a step-by-step evaluation, including load testing, to diagnose problems and ensure safe, reliable operation after auto body repairs.
After a car accident, diagnosing starter motor issues is crucial for safe and reliable vehicle operation. Assessing physical damage to the starter system is the first step, focusing on components like the motor, solenoid, and wires. Identifying common signs such as clicking noises or failure to engage the starter can indicate malfunction. A systematic approach involves testing each component—from battery connections to the starter motor itself—using basic tools for accurate diagnosis. This step-by-step guide ensures a thorough check for collision-related starter system problems.
- Assessing Physical Damage to the Starter System Following Collision
- Identifying Common Signs of Starter Motor Malfunction Post-Accident
- Step-by-Step Guide: Diagnosing and Testing Starter System Components
Assessing Physical Damage to the Starter System Following Collision

After a collision, assessing the physical damage to your vehicle’s starter system is crucial for accurate diagnostics. The starter system, comprising components like solenoids, brushes, and motors, can be significantly affected during an accident. Inspecting for visible signs of damage, such as cracks, deformations, or loose connections, helps identify potential issues that may require immediate attention from a car repair shop.
A thorough inspection should also include checking the starter motor’s mounting, belts, and wiring for any signs of wear or tear. In many cases, collision-related damages can cause these components to malfunction, leading to starting difficulties. Regular auto maintenance checks after an accident can help prevent further complications and ensure smooth operation of your vehicle’s starter system, ultimately facilitating safer driving conditions.
Identifying Common Signs of Starter Motor Malfunction Post-Accident
After a collision, it’s crucial to conduct a thorough check on your vehicle’s starter system. One of the first signs of potential malfunction is a clicking noise when you attempt to start the engine – this could indicate a weak battery or damaged starter motor. Another common symptom is delayed cranking or an engine that struggles to turn over; this may be caused by issues with the starter solenoid, cables, or internal components. Even if your car appears to start normally, unusual vibrations or noises during operation can also signal underlying problems that require attention from a qualified mechanic.
Don’t overlook potential signs of damage, such as visible alterations to the starter motor housing or nearby components, which might suggest the need for auto body repairs after an accident. Remember, prompt diagnosis is key; addressing starter motor issues early can prevent further complications and ensure your vehicle’s reliability following auto body services and car dent removal processes.
Step-by-Step Guide: Diagnosing and Testing Starter System Components

After a collision, diagnosing starter motor issues is crucial for safe vehicle operation and ensuring proper car body restoration. Here’s a step-by-step guide to navigating this process:
1. Inspect the Starter System Visually: Begin by checking for any visible damage to the starter motor, solenoids, and wires during your auto body services assessment. Look for signs of a dent repair or any loose connections, as these can indicate potential problems.
2. Test Battery Connections: Ensure the battery terminals are clean and secure. Corroded or loosely connected wires may cause intermittent starter failures. Clean the terminals if necessary and reattach them firmly.
3. Check Starter Motor Operation: With the engine off, try turning the ignition to the “Start” position while observing the starter motor. It should rotate smoothly. If it’s difficult to turn or makes unusual noises, further testing is required.
4. Inspect Solenoids: Solenoids are critical components that control the flow of current in the starter circuit. Test them by applying power and checking for any clicks or sounds. A faulty solenoid can prevent the starter from engaging properly.
5. Check for Power and Grounding: Use a voltmeter to verify power at each connector and wire leading to the starter motor. Ensure proper grounding as well, as issues here can cause intermittent or complete failure of the starter system.
6. Conduct Load Testing: Apply resistance to the starter motor circuit while it’s in operation to see how it responds. This test helps identify winding issues or damage caused by the collision.
After a collision, thoroughly checking for any signs of damage to your vehicle’s starter system is crucial. By understanding common indicators of malfunction and employing a systematic approach to diagnose components, you can efficiently address starter motor issues post-accident. Remember, prompt attention to these problems ensures a smoother restoration process, enhancing the likelihood of getting back on the road safely and reliably. Always consult with a professional mechanic for a comprehensive assessment if needed, focusing specifically on a thorough starter system collision check.