


To set up Tesla Sentry Mode, prepare a compatible USB drive with at least 8GB storage, format it as FAT32, and create a "TeslaSentryMode" folder. Follow steps to access and configure settings, download updates, test activation, and maintain regular updates for optimal performance, mirroring meticulous auto body restoration practices.
“Unleash the full potential of your Tesla with our comprehensive guide to setting up Sentry Mode. This advanced driver-assistance system offers enhanced security and peace of mind while driving. We’ll walk you through the process, from understanding the essential requirements to configuring your USB drive for optimal performance. By following our step-by-step instructions, you’ll be able to easily set up Tesla Sentry Mode, ensuring a safer and smarter driving experience.”
- Understanding Tesla Sentry Mode Requirements
- Preparing Your USB Drive for Configuration
- Step-by-Step Guide to Setting Up Sentry Mode
Understanding Tesla Sentry Mode Requirements

To set up Tesla Sentry Mode properly, it’s crucial to understand its requirements. Sentry Mode is a sophisticated driver assistance feature designed to enhance safety while driving. To begin the Tesla Sentry Mode setup, ensure your vehicle is equipped with the latest firmware and that you have a compatible USB drive ready for configuration. The USB drive will act as a key component in enabling this advanced system, allowing you to store and access critical data seamlessly.
When configuring your Tesla Sentry Mode, consider factors specific to luxury vehicle repair and car body restoration. Proper setup ensures optimal performance during driving conditions that might otherwise lead to accidents. This includes calibrating sensors for precise object detection and tracking, as well as integrating high-resolution cameras for a 360-degree view around the vehicle. An auto body shop specializing in luxury vehicle repair can provide guidance on achieving the best results, ensuring your Tesla’s Sentry Mode is not just functional but also enhances overall driving experience.
Preparing Your USB Drive for Configuration

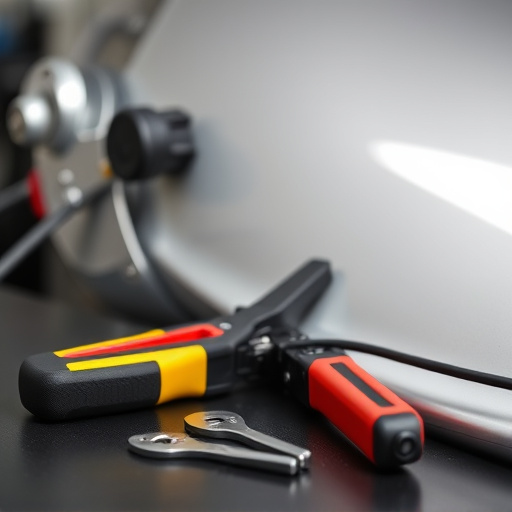
Preparing your USB drive for the Tesla Sentry Mode setup is a crucial step that requires attention to detail. Begin by ensuring your USB drive has sufficient storage space—at least 8GB is recommended for this process. Format the drive in the FAT32 file system, as this is compatible with both Windows and macOS devices. Delete any unnecessary files or folders to maximize available space. Once formatted, create a new folder named “TeslaSentryMode” on the root of your USB drive. This dedicated folder will house all the necessary configuration files for Sentry Mode.
Consider this step as a meticulous preparation process similar to how you would meticulously assess and prepare a vehicle for an auto glass repair or even a complex automotive collision repair. Every detail matters, from checking the USB drive’s compatibility with your Tesla model to ensuring its data management system is error-free. This thoroughness will ensure a seamless Sentry Mode setup, enhancing your vehicle’s security features without any glitches or errors.
Step-by-Step Guide to Setting Up Sentry Mode

Setting up Tesla Sentry Mode with a USB drive is a straightforward process that allows drivers to enhance their vehicle’s security features. Here’s a step-by-step guide for effortless integration:
1. Prepare Your USB Drive: Begin by inserting a compatible USB drive into your Tesla. Ensure it meets the required specifications, typically 32GB or higher. The car will automatically detect the drive and prompt you to format it. Choose the ‘FAT32’ file system option for compatibility with Tesla’s software.
2. Access the Sentry Mode Configuration: Once the USB drive is formatted, navigate to your Tesla’s settings menu and locate the ‘Sentry Mode’ option. Here, you’ll find the configuration settings for this advanced driver-assistance feature. Select the ‘USB Drive’ tab and choose ‘Configure’. The car will scan the USB drive for relevant files, which include camera feeds, sensor data, and other critical information required to activate Sentry Mode.
3. Select and Download Updates: If there are any available updates or new software packages on the USB drive, you’ll be prompted to download them. This step ensures your Tesla has access to the latest collision avoidance and security protocols. After downloading, confirm the installation and restart your vehicle if required.
4. Test Sentry Mode Activation: With the setup complete, test the functionality by simulating a potential collision scenario. Engage your Tesla’s autopilot or manually steer to trigger Sentry Mode. The car should respond with an alert and activate its safety features, providing a robust defense against potential collisions, much like a mobile collision repair service on wheels.
5. Regular Updates: To maintain optimal security, remember to update the USB drive periodically with the latest software versions. This ensures your Tesla stays ahead of emerging threats and enhances its capabilities, similar to how an automotive body shop keeps vehicles up-to-date with modern collision repair techniques.
Setting up Tesla’s Sentry Mode is a straightforward process that empowers owners to enhance their vehicle’s security. By following our comprehensive guide, which includes preparing a USB drive and executing simple steps, you can ensure your Tesla is protected while driving. Remember, a well-configured Sentry Mode is an essential tool for any Tesla owner looking to safeguard their investment on the road.