


Regular inspections using specialized tools are key to identifying and addressing damage to Tesla charging port connector pins. The repair process involves cleaning, inspecting, replacing damaged pins, reassembling, and testing. For precise execution, seek professional collision damage repair services if unsure, focusing on maintaining your electric vehicle's optimal condition.
“Discover how to tackle common yet frustrating issues with your Tesla’s charging port with our comprehensive repair guide. Understanding the causes of damage and learning effective inspection techniques is key to a successful fix. This step-by-step process equips you with the knowledge to identify and address connector pin issues, ensuring your Tesla remains in top shape for efficient electric vehicle charging. Master the art of Tesla charging port repair today.”
- Understanding Tesla Charging Port Damage and Causes
- Tools Required for Effective Connector Pin Inspection
- Step-by-Step Repair Process: A Comprehensive Guide
Understanding Tesla Charging Port Damage and Causes

Tesla charging ports are integral to the electric vehicle (EV) experience, making them susceptible to various forms of damage over time. Common issues include cracked or broken connectors, loose connections due to frequent use, and wear and tear from environmental factors like extreme temperatures and road debris. Understanding these potential causes is the first step in addressing any problems effectively.
While some minor damages might be rectified through DIY methods, such as paintless dent repair for smaller impacts, more severe cases often require professional vehicle repair services. Collision damage repair specialists are equipped to handle complex scenarios, ensuring that the charging port functions optimally and securely connects Tesla vehicles to power sources. Regular inspections can help catch issues early, promoting both safety and efficient Tesla charging port repair.
Tools Required for Effective Connector Pin Inspection

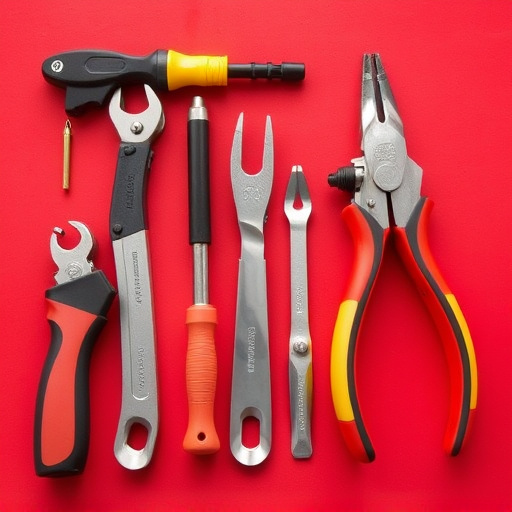
To conduct a thorough inspection of the Tesla charging port connector pins, several specialized tools are essential. These include a high-powered magnifying glass or loupe to ensure clear visibility of each pin, as well as a set of precision screwdrivers designed for delicate automotive components. Additionally, a fine-tipped screwdriver with a flat head is ideal for carefully removing and inspecting the individual connector pins without causing damage.
For accurate assessments, consider using a multi-meter or voltage tester to check for any continuity issues or pin misalignments. These tools enable you to verify the integrity of the charging port’s electrical connections, which are crucial for safe and efficient Tesla charging port repair. A vehicle body shop or collision repair center equipped with these tools can efficiently diagnose and address connector pin problems, ensuring your electric vehicle remains in optimal condition.
Step-by-Step Repair Process: A Comprehensive Guide

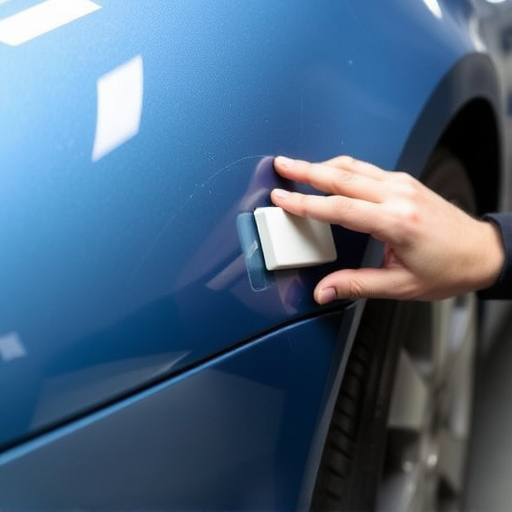
To begin your Tesla charging port repair, start by ensuring a safe and clean workspace. Park your vehicle on a level surface and engage park mode to prevent accidental movement. Put on safety gear, including gloves and eye protection, as a precautionary measure. Next, locate the charging port, usually nestled in the vehicle’s fender or side panel—this is where the repair process truly begins.
The step-by-step repair involves several key stages. First, remove any debris or damage from the charging port and its surrounding area, using specialized tools to gently clean without causing further harm. Next, inspect the connector pins for signs of wear, corrosion, or damage. If necessary, replace damaged pins with new ones, ensuring proper alignment during installation. After pin replacement or cleaning, reassemble the charging port, taking care to secure all components properly. Finally, test the repair by attempting to charge your Tesla, confirming full functionality before driving off. Remember, precise execution is key; consider seeking professional assistance if you’re unsure about any part of the process, especially when dealing with car bodywork services or auto body repairs.
When it comes to maintaining your Tesla’s charging functionality, understanding how to inspect and repair the charging port is crucial. By familiarizing yourself with common damage causes and utilizing the right tools, you can effectively address issues like connector pin damage. Following our step-by-step guide ensures a thorough repair process, keeping your Tesla charged and ready for electric driving adventures. Remember, timely maintenance on essential components like the charging port is key to maximizing your EV’s performance and longevity.