


Mercedes rim straightening requires specialized tools and expertise for severe cases. Before attempting DIY, gather essential tools like clamps, impact wrenches, and a rim straightening tool. Follow a detailed guide emphasizing safety and proper techniques, including lifting the vehicle, removing tires, and choosing between professional machines or manual methods. Ensure proper ventilation, reassemble tires, test drive, and consult professionals if needed for optimal Mercedes rim straightening results.
Can you tackle a DIY Mercedes rim straightening project at home? Yes, it’s safer and more cost-effective than you might think! This comprehensive guide breaks down the basics of Mercedes rim straightening, detailing the tools and materials needed for a successful at-home correction. Learn how to safely straighten your wheels step-by-step, saving time and money while achieving professional results.
- Understanding Mercedes Rim Straightening: The Basics
- Tools and Materials Required for DIY Correction
- Step-by-Step Guide: Safely Straighten Your Mercedes Rims at Home
Understanding Mercedes Rim Straightening: The Basics

Mercedes rim straightening is a specialized process aimed at restoring damaged or warped wheels to their original factory-like condition. It involves correcting distortions in the metal rim, ensuring both aesthetic appeal and optimal performance. The technique is particularly relevant for Mercedes owners who value their vehicle’s premium appearance and want to avoid costly visits to a vehicle body shop.
While some people might attempt DIY auto body repairs for cost savings, Mercedes rim straightening requires specialized tools and expertise. Improper techniques or use of subpar equipment can lead to further damage. As such, many opt for professional services, ensuring the job is done right. In cases where slight distortions are present, DIY methods could be feasible, but for more severe cases, it’s best left to experts who have the necessary experience and tools to handle complex vehicle body repairs effectively.
Tools and Materials Required for DIY Correction

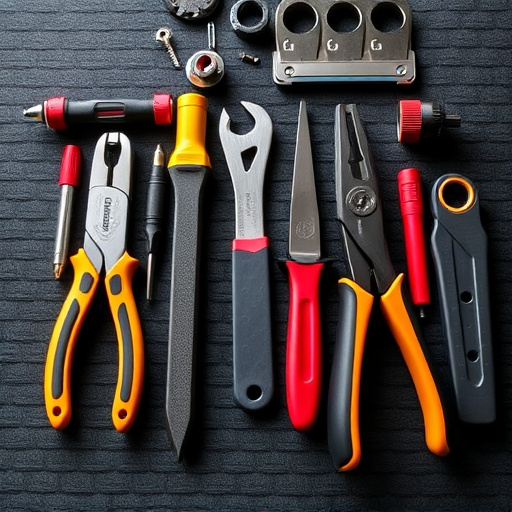
Before tackling any DIY Mercedes rim straightening project, it’s crucial to assemble the right tools and materials. You’ll need a variety of items commonly found in both classic car restoration and tire services workshops. This includes a set of sturdy clamps specifically designed for wheel removal, a impact wrench or socket set with the appropriate size for your Mercedes wheels, a rim straightening tool (also known as a wheel puller), and a set of precision measuring tools like calipers and angle gauges. Safety gear, such as work gloves and safety glasses, is also essential to protect against debris and potential injury during the correction process.
Beyond these essentials, consider having access to auto repair services expertise if you’re new to this type of repair. While many techniques for Mercedes rim straightening can be done at home with the right tools, understanding the intricacies involved and being confident in your abilities is key to achieving a professional result and avoiding further damage to your valuable wheels.
Step-by-Step Guide: Safely Straighten Your Mercedes Rims at Home

Step-by-Step Guide: Safely Straighten Your Mercedes Rims at Home
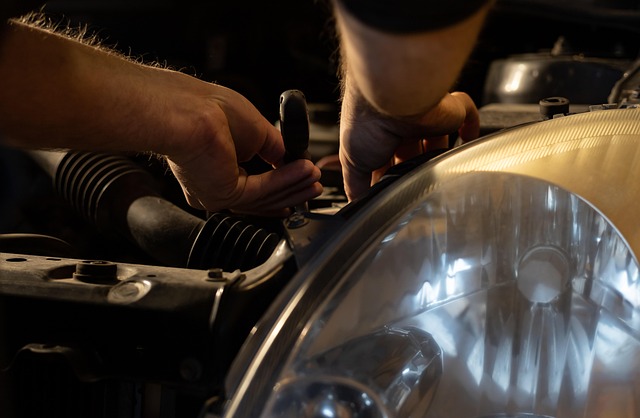
If you’re a DIY enthusiast with a knack for automotive care, straightening your Mercedes rims at home could be a feasible project. Before beginning, ensure your workspace is well-lit and equipped with essential tools like jack stands, impact wrenches, and a set of high-quality torque wrenches. Start by lifting the vehicle using a sturdy jack and securing it with jack stands for stability. Next, remove the tires to gain full access to the rims. Inspect each rim carefully for any damage or deformity before proceeding.
For a safe and effective straightening process, consider investing in a professional rim-straightening machine designed specifically for precision automotive body work. These machines use advanced technology to realign the rims without causing damage to the alloy surface. Alternatively, you can opt for manual methods like using specialized tools or even home appliances (like a bench press) to apply gradual pressure and straighten the bent rims. Always follow safety protocols, wear protective gear, and ensure proper ventilation throughout the process. Once your rims are straightened, reassemble the tires, lower the vehicle, and test drive it for a smooth ride. If you’re not confident in your abilities or encounter any complications, don’t hesitate to consult professional car repair services or automotive body work experts.
While DIY Mercedes rim straightening is theoretically feasible with the right tools and precautions, it’s crucial to weigh the risks against professional expertise. While some minor dents or deformities can be corrected at home, severe damage or improper correction could lead to unsafe driving conditions and permanent rim damage. If your rims exhibit significant deformities or you lack confidence in your DIY skills, consulting a professional for Mercedes rim straightening is advisable. This ensures not only the safety of your vehicle but also preserves the long-term value and aesthetic appeal of your Mercedes wheels.