


Tesla chrome trim repair after panel or door replacements requires specialized techniques due to the trim's sensitivity. Tools needed include sandpaper, restoration kits, and precision instruments. Training or guidance from professionals ensures a factory-like finish. Prepare the area, apply primer and paint, then seal with clear coat for optimal results.
Tesla owners often find themselves facing the challenge of repairing damaged chrome trim after panel or door replacements. This comprehensive guide addresses the common issue of Tesla chrome trim deterioration, offering a step-by-step approach to restoration. Understanding the potential causes of damage and gathering the right tools and materials are key to achieving a factory-like finish. Learn how to navigate this process efficiently and effectively, ensuring your Tesla retains its sleek, modern aesthetic post-repair.
- Understanding Tesla Chrome Trim Damage After Replacement
- Tools and Materials for Successful Repair
- Step-by-Step Guide to Restoring Chrome Trim on Tesla Vehicles
Understanding Tesla Chrome Trim Damage After Replacement

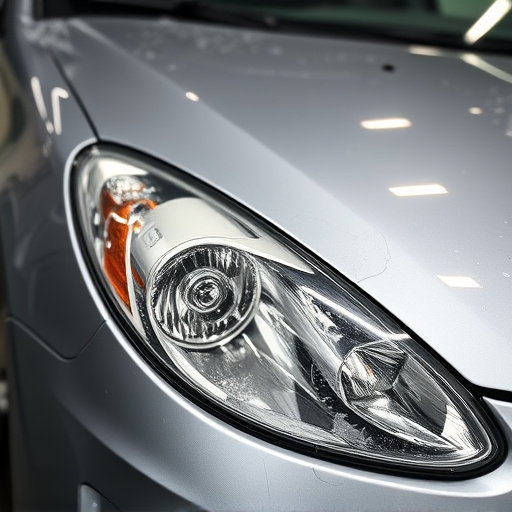
When a Tesla owner replaces a panel or door, they often find themselves dealing with damaged or discolored chrome trim. This is a common issue due to the delicate nature of chrome and its exposure to various environmental factors during the replacement process. Even the most careful installations can lead to nicks, scratches, or premature fading, especially in regions prone to extreme temperatures and humidity.
Proper Tesla chrome trim repair involves understanding these potential pitfalls. It requires a skilled hand to assess and address the damage, whether it’s a simple polish to restore the shine or a more intensive restoration process to revive the chrome’s original luster. Many auto body shops now offer specialized services for luxury vehicle repair, including car scratch repair techniques tailored to Tesla’s unique chrome finishes, ensuring your vehicle maintains its sleek and modern appearance.
Tools and Materials for Successful Repair

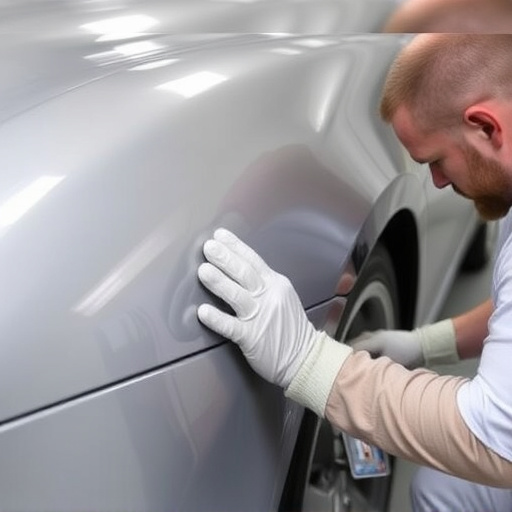
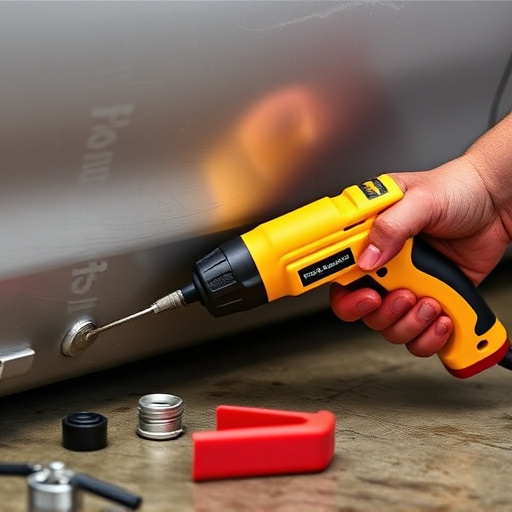
To successfully undertake a Tesla chrome trim repair after panel or door replacement, several specific tools and materials are essential. This includes fine-grit sandpaper for smoothing edges and removing any old adhesive residue, as well as a high-quality chrome restoration kit that comprises of cleaning solutions, polishes, and protective coatings designed to match the vehicle’s specifications. A set of precise cutting tools is crucial for shaping new trim pieces to fit seamlessly with existing parts, while precision tweezers are ideal for handling small components and applying adhesives accurately.
Additionally, consider having a dent removal kit on hand for addressing minor dings or dents that might occur during the replacement process. While not directly related to chrome trim repair, proper training in automotive body work, akin to what you’d find at a mercedes benz collision repair shop, is invaluable. This ensures that every step is executed with precision, resulting in a factory-like finish. An experienced technician or a reputable automotive body shop can provide guidance on the best practices for Tesla chrome trim repair, ensuring longevity and aesthetic appeal of the vehicle’s interior.
Step-by-Step Guide to Restoring Chrome Trim on Tesla Vehicles

Restoring Tesla’s chrome trim after panel or door replacement is a meticulous process that requires precision and the right tools. Here’s a step-by-step guide to help you achieve a professional finish:
1. Preparation: Begin by thoroughly cleaning the area to be restored. Use a soft cloth and a mild, chemical-free cleaner to remove any dirt or grease. Ensure the surface is dry before proceeding. For a more in-depth clean, consider visiting an auto collision center for a proper fender repair that includes detailed preparation of your Tesla’s surfaces.
2. Sand and Etch: Lightly sand the chrome trim using fine-grit sandpaper to ensure better adhesion for the restoration product. After sanding, use an etcher or degreaser to remove any remaining contaminants. This step is crucial for achieving a strong bond between the restore material and your Tesla’s chrome.
3. Apply Primer: Use a high-quality automotive primer specifically designed for chrome restoration. Apply an even coat, following the manufacturer’s instructions for drying time. A good primer will help seal the surface and prepare it for painting.
4. Paint with Care: Select a chrome or metallic paint that matches your Tesla’s original finish. Using a fine brush or spray gun, apply thin, even coats, allowing each layer to dry completely before adding the next. This meticulous process ensures a seamless, vibrant finish that complements your vehicle’s overall look.
5. Seal and Buff: Once the final coat of paint is dry, apply a clear coat sealant to protect the restored chrome trim. Buff gently with a microfiber cloth for a glossy, professional finish. For optimal results, consider visiting an automotive restoration specialist who can expertly handle these intricate details.
After panel or door replacement, repairing Tesla’s delicate chrome trim is essential to maintain the vehicle’s sleek and modern aesthetic. By understanding the common causes of damage, having the right tools and materials, and following a structured guide, owners can successfully restore their Tesla’s chrome trim, ensuring a long-lasting, like-new look. This DIY approach not only saves costs but also allows for precise customization, making your Tesla stand out on the road. Remember, a well-restored chrome trim is a testament to your vehicle’s care and attention to detail.